For our final Digital Photography project, our assignment was to create a Hyper-Realistic photo using our creativity and Photoshop. In this assignment, we were to use a minimum of two images we have taken and combine them in order to create a surreal looking photo.

For this assignment, I really wanted to try to emulate all of those cute pictures of coffee and mugs people can see on the internet. I really love tea and coffee, so for some reason, that is just what popped up into my mind. My idea was that I could Photoshop a face onto the picture of a latte on top of the foam, similar to latte designs.
HOWEVER! When trying to do this, I realized the foam wasn’t translucent enough and any face projected on top of it looked really out of place and did not blend together well.
After facing this setback, I decided to use my second favorite beverage – tea – instead of coffee. The tea was already translucent and it was not too dark, so I found it to be easily blend-able.

The above image is my source image in my photo. I decided in Photoshop to crop the image dramatically and to play with saturation and color a bit.

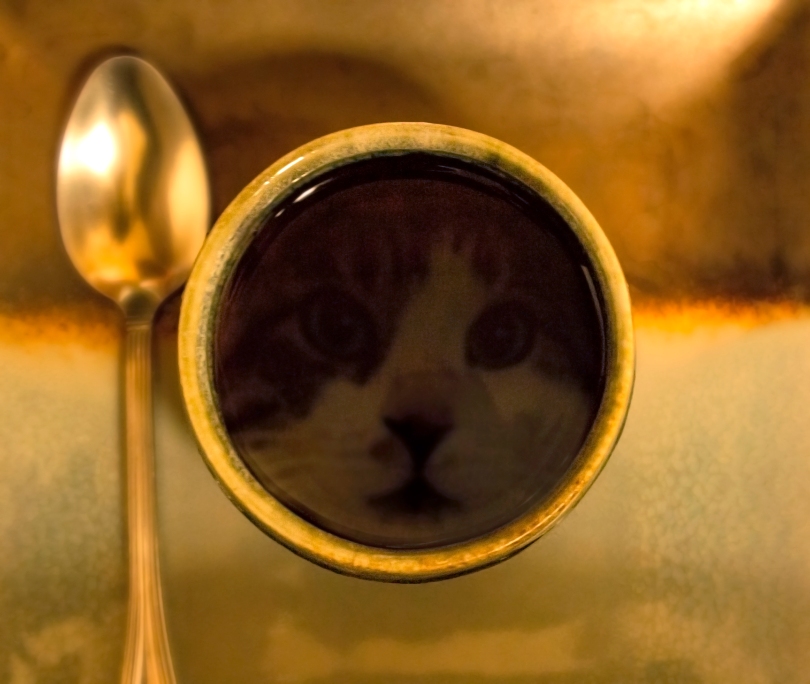
I blurred the plate and the spoon in order to bring the rim of the cup and the tea up in extreme sharpness. I think the sharp rim of the cup is what’ll be the main focus point in a viewer’s eye. I think it makes the photo a bit more surreal as well, as it makes the cup almost cartoonishly stand out against the background.

My problems arose when dealing with the cat I was taking photos of. I decided it would be more surreal to have an animal face in the reflection of the tea rather than a human. The picture above is the best picture I was able to get of him unfortunately.
Luckily I was able to get a picture of him looking at the camera head on, but unfortunately, the photo itself is out of focus and dark. However, I was able to change these technical difficulties into advantages. For example, it was actually good that his face was dark and blurry because ultimately it made his photo easier to blend in with the tea.

I used a layer mask and used a black and white gradient tool to blend the cat’s face in more with the tea. I then dropped the opacity on his face to give the illusion of being a reflection. After that, I edited the color balance, exposure, and the brightness/contrast.

All in all, I’m pretty happy with the photo. There are some things I wish I could’ve gone back and redone, but I’m overall pleased with the finished product. I think this was a lovely assignment to end the class on, as it was a lot of fun and allowed us a great deal of creativity. I really loved this assignment, and this class as a whole! I think I have a much deeper understanding and appreciation for photography now.
